Slack Setup
Before starting your first session, you need to create a Slack app and configure summon-claude with its credentials.
Prerequisites
- Slack workspace where you have admin access (or can request admin approval)
- The summon-claude app manifest from the repository
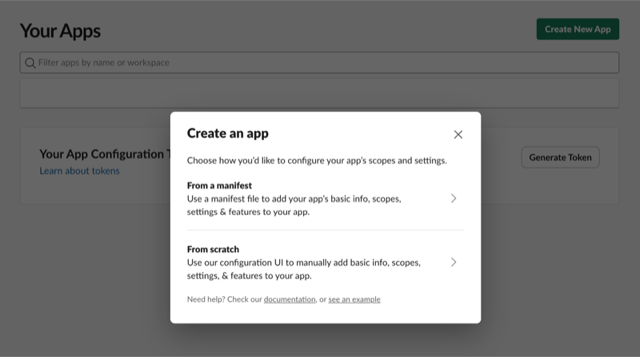
Step 1: Create the Slack app
-
Go to api.slack.com/apps and click Create New App
-
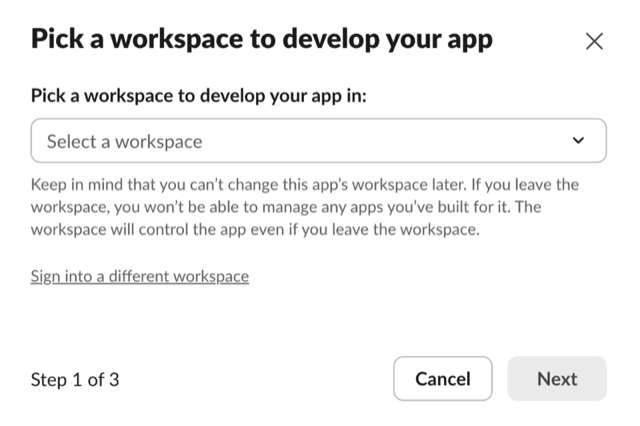
Choose From a manifest
-
Select the workspace where you want to install summon-claude
-
Select the YAML tab (Slack defaults to JSON), then paste the contents of
slack-app-manifest.yamlfrom the repository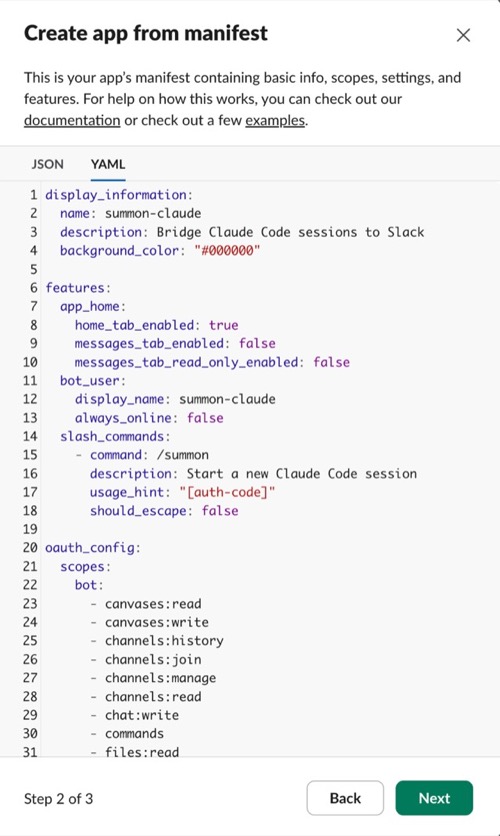
-
Click Next to see Slack's review screen. Verify:
- App name is summon-claude
- Scopes include
channels:manage,chat:write,reactions:write, and others - Features show Socket Mode enabled
Then click Create
Using the manifest
The manifest pre-configures all required scopes, event subscriptions, and Socket Mode settings. Do not create the app manually — the manifest ensures nothing is missed.
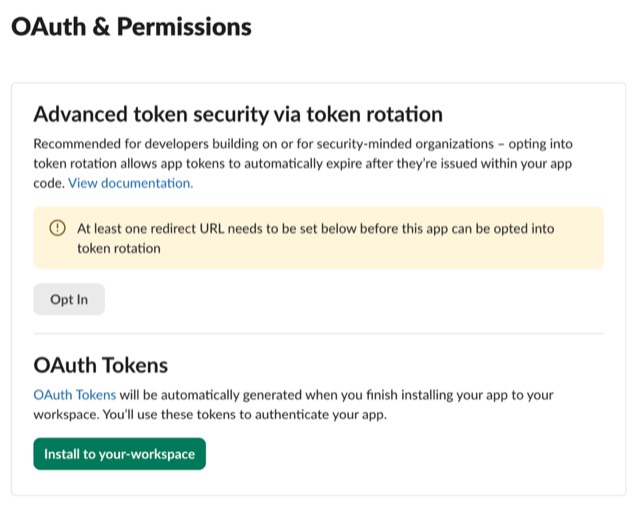
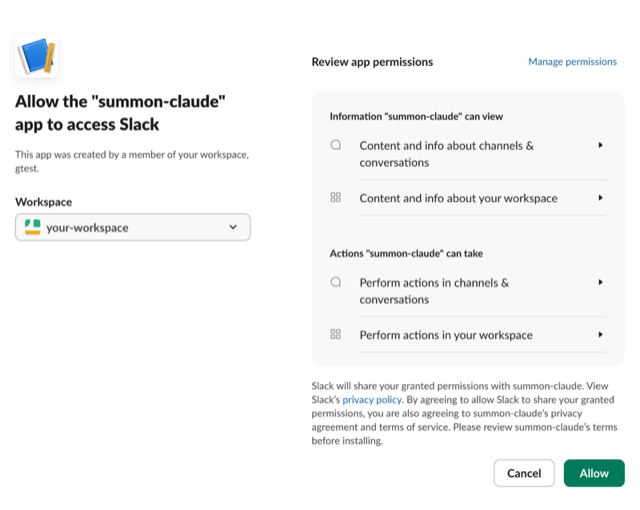
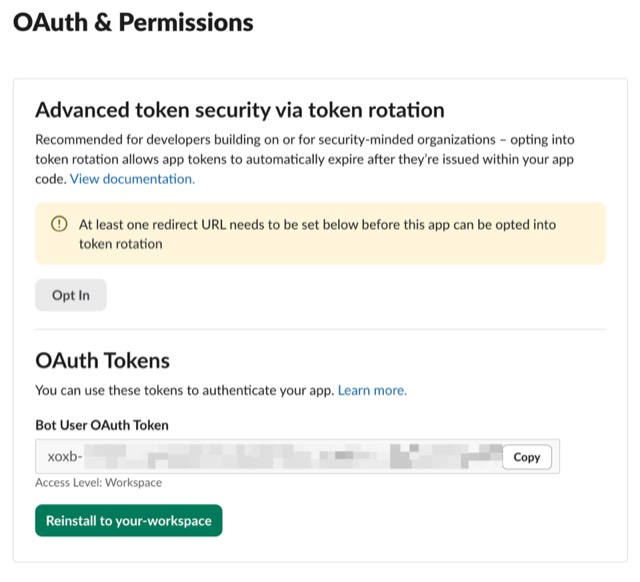
Step 2: Install to your workspace
After creating the app, install it to your workspace:
-
Go to OAuth & Permissions and click Install to Workspace
-
Review the permissions and click Allow
Step 3: Verify Socket Mode is enabled
The app manifest sets socket_mode_enabled: true, so Socket Mode should already be on. To confirm, go to Settings > Socket Mode in your app settings and verify the toggle is enabled.
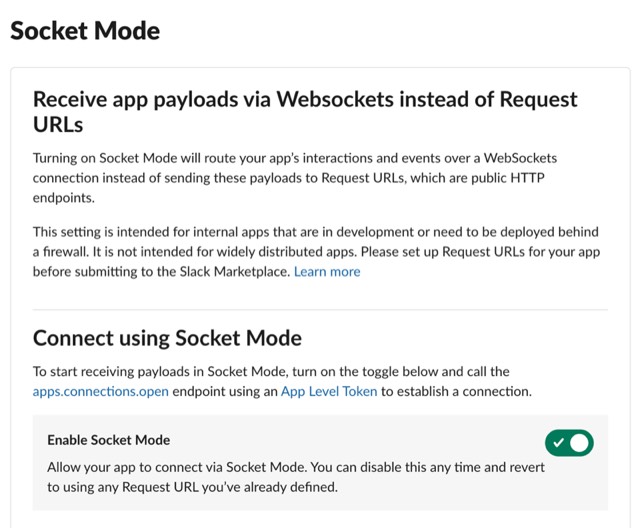
Socket Mode is required
summon-claude uses Socket Mode (WebSocket) for real-time event delivery. Without it, the app will not receive messages from Slack. If the toggle is off, enable it manually — this can happen if the app was created without the manifest or if the setting was changed after creation.
Step 4: Generate an App-Level Token
-
Go to Settings > Basic Information > App-Level Tokens
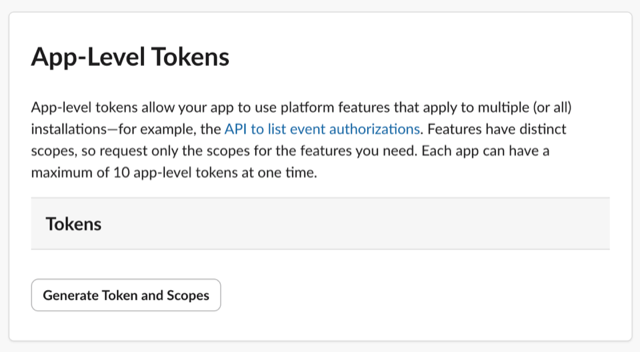
-
Click Generate Token and Scopes, name it
summon-claude, and add theconnections:writescope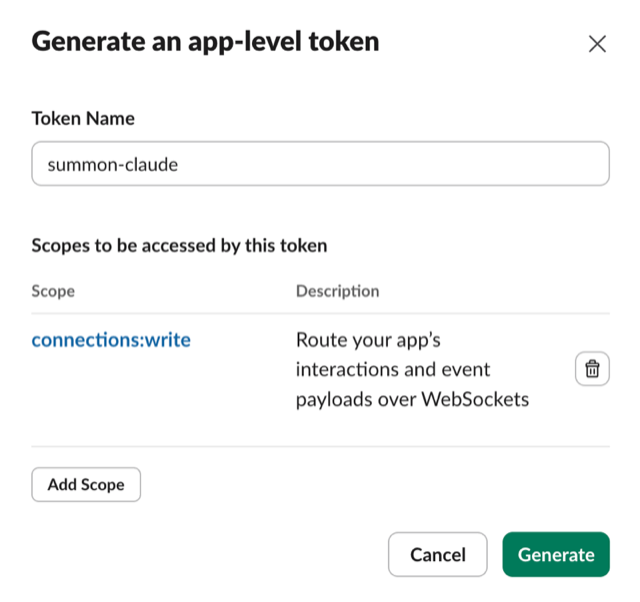
-
Click Generate and copy the token (starts with
xapp-)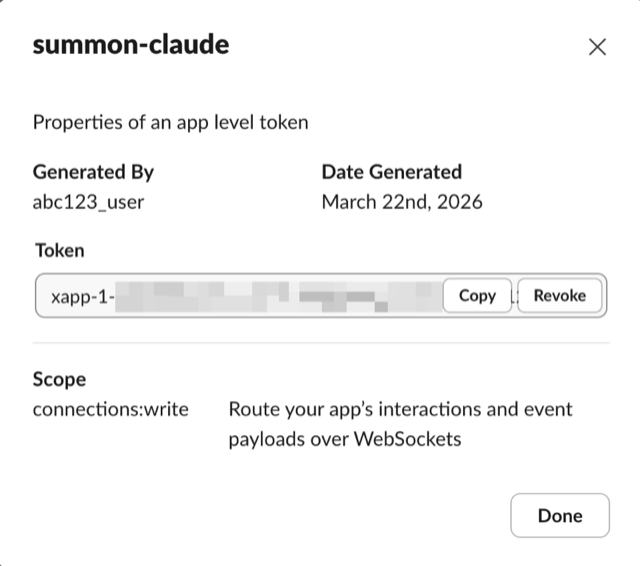
Step 5: Collect your credentials
You need three values from the Slack app settings:
| Credential | Where to find it | Format |
|---|---|---|
| Bot Token | OAuth & Permissions > Bot User OAuth Token | xoxb-... |
| App Token | Settings > Basic Information > App-Level Tokens | xapp-... |
| Signing Secret | Settings > Basic Information > App Credentials | 32-character hex string |
Step 6: Configure summon-claude
With your credentials collected, proceed to the Configuration page to run the setup wizard and verify your installation.
Common setup errors
Wrong scopes : If you created the app manually instead of from the manifest, required scopes may be missing. Check OAuth & Permissions > Bot Token Scopes and compare against the manifest.
Missing App-Level Token
: The App Token (xapp-) is separate from the Bot Token (xoxb-). If you skipped Socket Mode setup or the App-Level Token generation, it will not exist.
Socket Mode not enabled
: summon config check will report a connection failure if Socket Mode is off. Toggle it on at Settings > Socket Mode.
connections:write scope missing
: The App-Level Token must have the connections:write scope. If you generated a token without this scope, delete it and generate a new one.
Not installed to workspace : After creating the app from the manifest, you must click Install to Workspace to generate the Bot Token. Without installation, no token exists.
Next steps
With your Slack app created and credentials collected, configure summon-claude: